If you are living in an older home and need brighter outdoor lighting than sit back and allow me to show you how I did it.
Why would you need a new outdoor wall light?
There can be a number of reasons, but here are some I feel is a great reason to upgrade:
- Security – brighter outdoor light can offer security when you come home late or for the backyard
- Party – if you don’t have much lighting on your porch or backyard, a new lighting can offer brighter lighting for your evening parties or get together
- Energy/Cost Saving – new lights offer much brighter lighting plus low energy usage which leads to cost saving
Why did I install a new outdoor light?
My side gate was always dark and the light switch is at an inconvenient spot where I can’t reach once I opened my door to the side gate. I happen to have my trash can near the side gate, and taking trash out in the dark was not fun when you stumble on things on the way out. Security was always on the back of my head and the side gate was always a vulnerable spot.
What did I do about it?
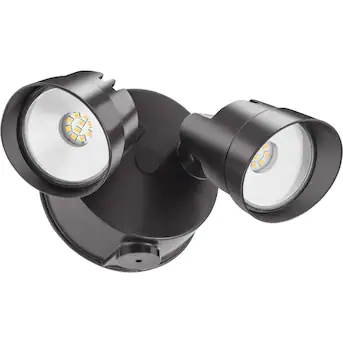
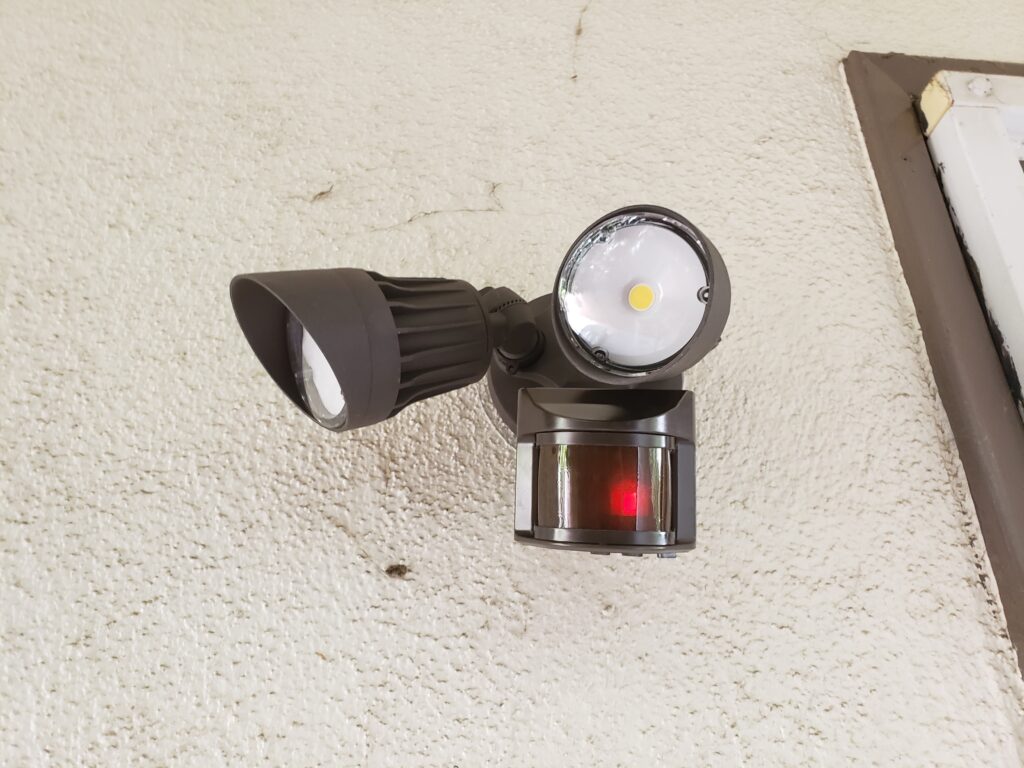
I decided to install a motion sensor floodlight. It’s nice and bright and only come on when I go outside and also add security when there is motion in the back. It mostly scares the critters like raccoon and possums away.
What did I need?
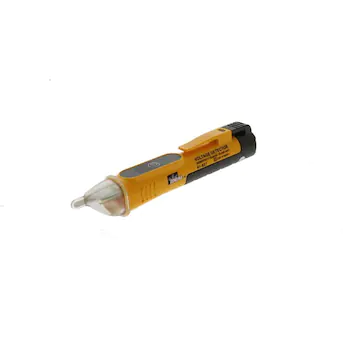
I bought a floodlight from Costco and the tools I used was screw driver, pliers, and a voltage tester/meter.
How did I do it?
*warning, don’t try this at home. I’m not a license electrician. This is not educational information. This is strictly for entertainment.*
First, turn off the electrical breaker for the outdoor light. I didn’t know which breaker it was, so I left the outdoor light on and went to the electrical panel and turn off a breaker at a time to see did my outdoor light turn off. If it didn’t, I would turn the breaker back on and move on to the next breaker and turn that breaker off to test. Also make sure your appliance are turn off if you want to turn off your breakers. I’m not responsible for your electrical damage.
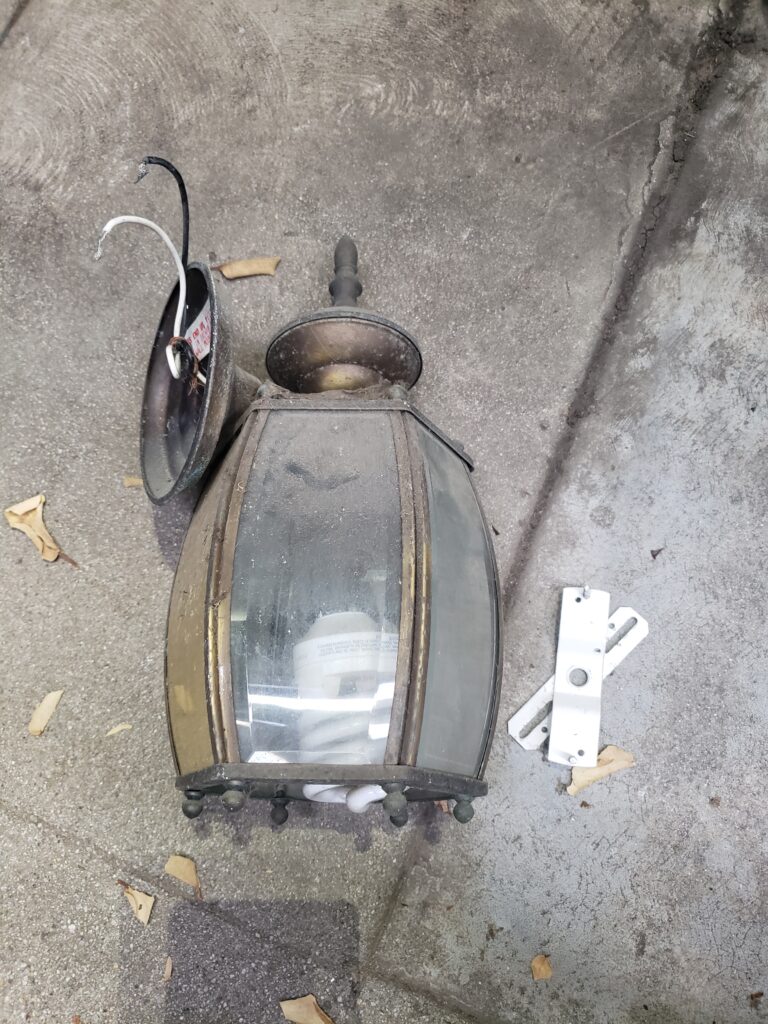
Once I found the breaker that turned off my outdoor light, I proceed to do further testing with my voltage tester/meter to validate no electrical current was going to my light. Once that was validated, I took off my old outdoor lamp off.
Pro tip – always take a picture of the wiring before taking things apart in case you need to reinstall it again. Example: the new outdoor light is defective and you need to return it and you don’t have time to return it anytime soon.
Off goes my old dim lamp
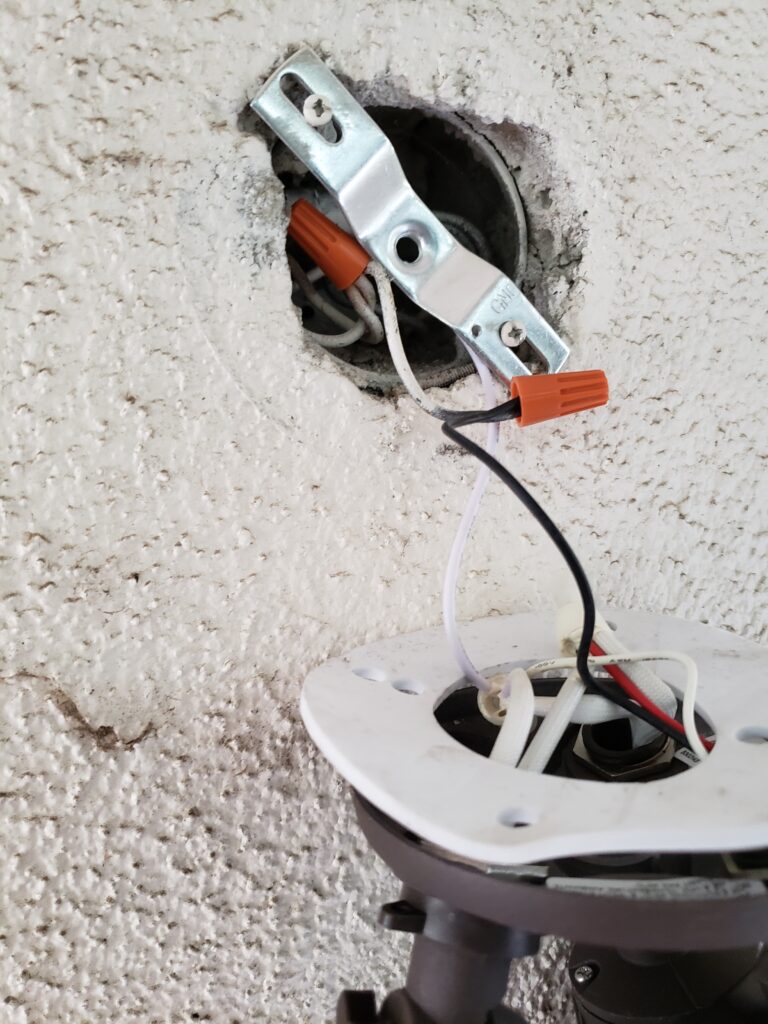
My wiring was pretty simple. It only had a white and black wiring. Install the light mount and connect the outdoor light.
At this point, turn on the breaker from the electrical panel. You can now test the light by turning on the light switch.
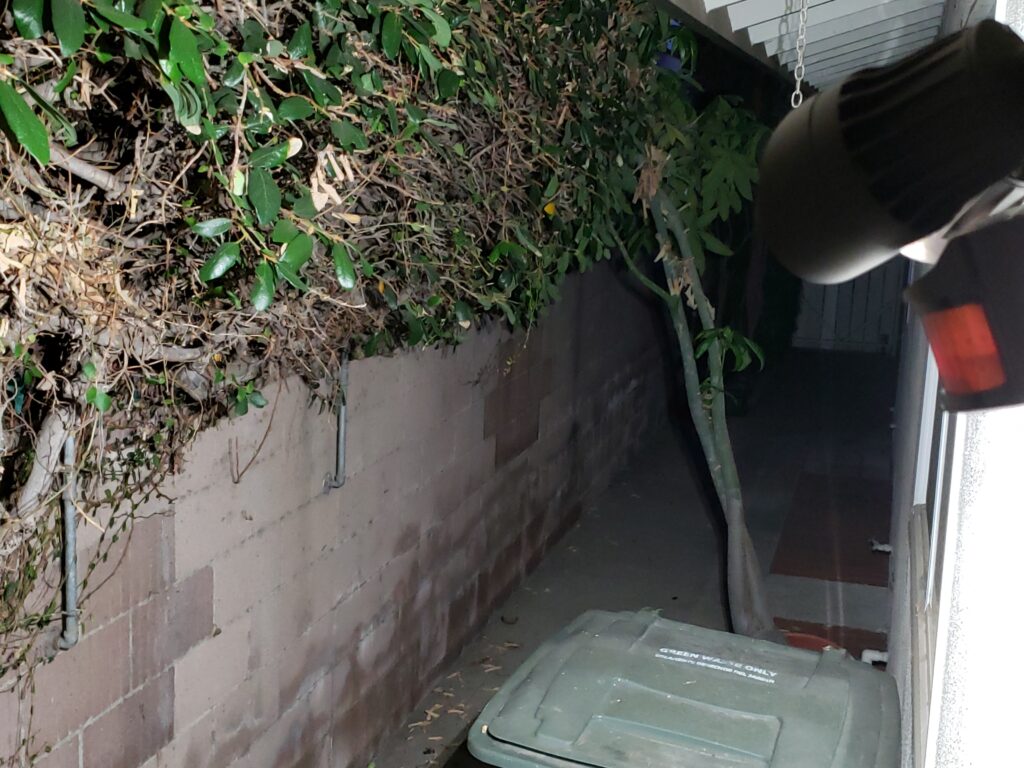
The process took about 15 minutes. Now I have a bright motion sensor light with added security. Cheers!!!
Wonderful post! We are linking to this great content on our website. Keep up the good writing.